
Diaries from a first time camper remodel! – With updated photos 2020!
I’m finally sharing our pop-up camper renovation! (so far.. it’s not completely finished, but the finishing touches are on hold until spring) It was such a fun task last year. She wasn’t finished until late fall, so we really only got to camp in her all finished one time before having to close her up. However, we’re nearing the end of winter in the midwest, and I can’t wait to get her back out this spring and enjoy the start to the camping season!
I wanted to hurry up and post this reno, along with my new blog update, so that you can have some inspiration for re-doing your own camper this year! I’m adding a shopping link at the end of the post with direct links to everything I used in this camper. If you like my suggestions and want to incorporate them into your own project, it would mean so much if you used my links to shop! It’s no cost to you, but I’ll earn a very small commission if you use my links. So thank you!
As you all know, I LOVE remodeling and DIY projects, and this little pop-up was the perfect “small” project with a HUGE impact! I did the majority of the remodel myself, and the hubby, Michael, helped with some of the heavy lifting and installing the flooring. To begin the story, let’s start with the day we brought this little 2000 Viking PUP home.
We were looking for a cute little pop-up to remodel, and wanted to get started quickly on it. I was searching Marketplace and had my husband go look at this one. He decided to purchase it, but when he brought it home, it was in a lot worse shape than what I had in mind. It was FILTHY, missing the entire couch (more on that later), and would need a brand-new canvas, as the one on it had huge holes in the screens. I tried to screen repair kits, but the holes were just too much. It looked like the inside covers and the outside screens had all been torn and/or eaten by mice. Gross! She also smelled awful. There were green countertops, ugly vinyl flooring, worn honey “oak” cabinets, faded bright gold hardware, outdated and dusty curtains and upholstry. The gentleman that had her had used her for guys ice fishing trips, and she just wasn’t taken care of at all. Here are some photos of what she looked like that first morning.


Pretty rough, AMIRIGHT?? If you look on the exterior of the middle photo, you can faintly see a “happy 4th of july” in marker on the front of the canvas. Insert face palm. Also, to the missing couch.. The owner had told my husband that they took out a “cabinet” to put in that huge fridge, however, I quickly realized that it was not a cabinet that was missing.. It was THE ENTIRE BENCH COUCH. hahaha.. So, you’ll see what I did with that space as you go through the update, but the plan is to eventually put a built-in storage bench there in that spot.
As you can see, there was a LOT to do! These were the items on my list, that I wanted to do to the camper.
- CLEAN her WELL
- Paint the cabinets and walls white
- Re-surface all of the ugly green counters & table top.
- New curtains
- Re-cover the dining cushions
- New flooring
- Figure out what to do with the missing couch
- Paint and fix the exterior
I researched a ton of camper flipping blogs and tutorials and decided to go with a traditional sanding, de-glossing, primer, and oil based paint for the cabinets. I read that the oil based paints hold up much better in something like a popup that isn’t typically temperature controlled. I really wanted to go with one of the no-sand, no-prime methods, but I also wanted something that would be durable and hold up well in heat and cold, and all of the variations in-between. I also have children, and wanted something that would be easy to wipe up, and hold up well to kids who aren’t always careful with what they’re doing, or where they’re stomping or slinging mud. Can I get an AMEN from all of the moms?!
So I went with the Kilz Primer and Rustoleum Oil Based Enamel in glossy white. You could also do a semi-gloss, but my local Wal-Mart only carried the gloss, so I just went with that. So on to step one.. Sanding and priming!
This is probably the worst part, and at this point, it feels like WHAT am I doing?? WHY did I think this was a good idea? Trust me, it’s worth it, and once you get through it, you’ll be so happy you did!


As far as the process, I first removed all of the hardware and cabinet doors. I sanded, painted, and primed the doors in my garage, and sanded and painted the cabinet boxes and walls inside the camper. I used a flat black spray paint to paint the existing hinges, and screws. The existing pulls were VERY ugly, and weren’t the shape that I wanted, so I decided to invest in new hardware for the pulls rather than painting those.

The whole process left me looking super glamorous.
I wanted to do a combo of flat black and gold accents, so for the table legs, and the faucet, and some of the grill panels, I used a pretty gold spray paint for those, and I love how that turned out! You can see the specific paints I used in the products linked at the end of the post.

The sanding & painting process is so tedious and time consuming, but the end result is definitely worth it!
Now, moving on to some design elements. I went back and forth on a color scheme, materials, etc.. And after trying out several combo’s, and bringing home a lot of samples, I finally went with this!

I ended up going with this combo! The striped material will be the curtains, the floral fabric will be the seat cushion backs, I’m doing a brown faux leather covering for cushion bottoms, a barnwood peel and stick flooring, and a glossy marble peel and stick roll for the countertops and tabletop.
After all of the cabinets were finished, I started working on covering the cushions and covering the countertops with the vinyl roll. For the cushions, I just did the simple wrap around the existing cushions and I wrapped it like a “present” and secured with safety pins. We were only able to camp in it twice before the end of the season, and while this was a simple way of re-covering, I want to do something more permanent and will probably do the cover and staple method to the back. Some of the safety pins would come open while sitting on the bottom cushions especially, and poke us in the legs, so this spring, I’m going to do a more permanent job of recovering!

In all, I ended up using 4 yards of each of the fabrics, and had some left over. Because I covered each of the cushions all the way around to do the tuck and pin method, I needed more material. When I end up re-doing these with the staple method, I will probably end up having to trim some of the material off of the undersides, especially on the bottom cushions.
So moving onto the countertops. I saw different tutorials for re-doing countertops including different painting methods, but I decided to go with a marble countertop cover paper. The one I chose is VERY thick, and I love how shiny it is, and how the “veining” is very subtle. Putting it on, was a little tricky. I watched a few different youtube video tutorials on how other people did it with a hair dryer, and used a squeege to get the bubbles out, and that worked the best. Some of the tops still do have some bubbles, but they aren’t very noticeable.
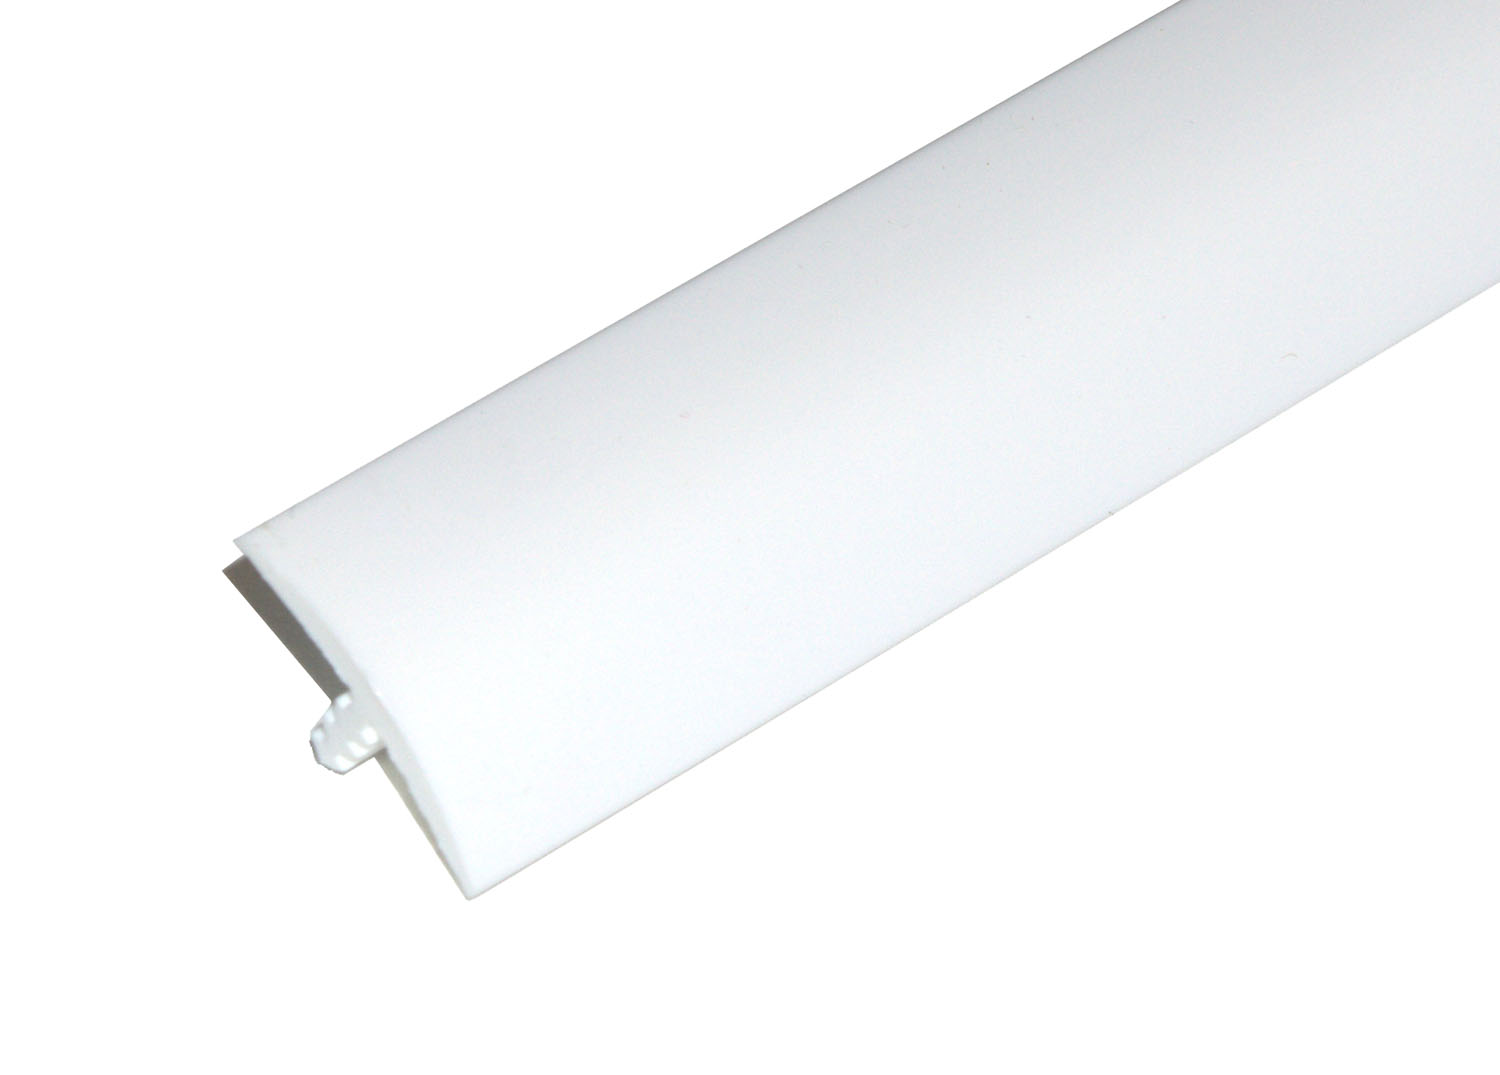
I also ordered some new white t-moulding from T-moulding.com to replace the awful green edging that was currently on the countertops. You order it by the foot, so the way I got my measurements was to take all of the existing moulding off, and measure it to know how much I needed to order. I also kept the old stuff, and used it as a “template” to cut the sections of the new moulding. It worked perfectly! You can see what I ordered here: White 3/4 T-Moulding (not an affiliate link)
Here is a video of the first countertop that I resurfaced, as well as some photos of the completed sink countertop with the painted faucet! I am in love with it!!

All in all, the process of updating this camper took a couple of months. I was working on it most days, but not EVERY day.. We had a scheduled trip to go camping with friends mid-August, so our goal was to have a lot of the interior work finished by then. So the week before we were taking her camping, it came time to install the flooring! I’ll link the flooring that we went with from Lowes. It’s a peel and stick, but we also used a spray adhesive, because with the temperature fluctuations in the camper we wanted to make sure that those floors were STICKING! Check out the video below for the flooring install day!


So we put in the flooring literally DAYS before we took her camping the first time, and because it wasn’t finished, and we rain into a few issues getting her set up (like NONE of the electrical working), I didn’t take any photos, but I DID do a video walkthrough of everything put together.. so I’ll post that here! After this camping trip, she decided to replace the canvas before our next WEEK long camping trip in October, so in order to get the canvas back in time, I had to take the top off and send it in 2 days after we returned from this trip. So.. stay tuned for part DUCE to see the canvas replacement, and before/after interior and exterior photos and details on what I did to update the outside, and the new canvas, including installation details!
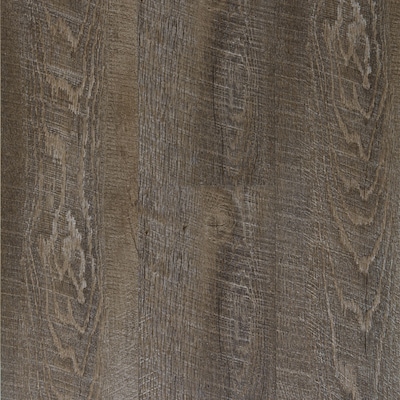
Here are is the flooring that we purchased from Lowe’s for those who want to check it out! (not an affiliate link)
Lowe’s Peel and Stick Flooring – Driftwood
Ok, without further ado .. here is the video walkthrough from the first camping trip!!! I’m SO IN LOVE with this little camper! And let me just say.. it smells BRAND NEW! The floor is new, and everything, including the ceiling is Kilz primered and painted. Isn’t she beautiful????
Ok.. now on to what I like to call .. PART DUECE!!
So, like I said before, we had such a tight time-frame between getting the flooring down, camping, and removing the canvas to send in, it was a little stressful, and hard to get any great photos of the inside at this point. Plus, I really wanted to take the “after” photos with the NEW canvas!
When choosing a company for the canvas replacement, I contacted and researched several companies, and in the end decided to go with Bear Creek Canvas. I read SO MANY great reviews about the company, and the quality of their canvases, AND I was working with a short time-frame, and they were able to get the finished canvas back to me in time! They had three available color options, and I decided to go with their green. I also liked the gray, but I had seen examples where the gray was darker inside, and I really wanted a bright/airy interior.

Green 
Tan 
Gray
I was a little worried about taking the canvas off, but it was really so simple! I actually did the entire thing myself in less than an hour, and had it boxed up and ready to ship to them the next morning. You don’t always have to send a canvas in as a template, as they have some already in stock and templates on hand, but mine was old enough and a model that they didn’t carry, so it required me to send my current canvas in as a template. During this time I also painted the outside, applied a cute decal, and found the CUTEST back tire cover!
All in all, it took about 7 weeks to come in, and it got here DAYS before our week long camping trip for Sukkot! The canvas was gorgeous, fit perfectly and I can’t say enough great things about Bear Creek!
So to put the canvas on, they suggest you lay out the canvas in pieces according to where they will lay. You also start with the door pieces and work your way around. They have great instructions, and the canvas went on great! The hardest part is making sure that all of your seams come together perfectly, because if you have any side that is not lined up, it becomes a bigger issue as you go around the camper.


I think it took Michael and I about an hour or so to put it on. The beginning was the hardest part, but once we got started, it was pretty easy all the way around! It started raining on us, and got dark towards the end, so I went out to the campsite the next day to take photos. Here she is all finished from the outside!


Pop Up Camper Exterior Renovation 
Camper Spare Tire Cover Happy Camper 
Camper Vinyl Decal Adventure Awaits
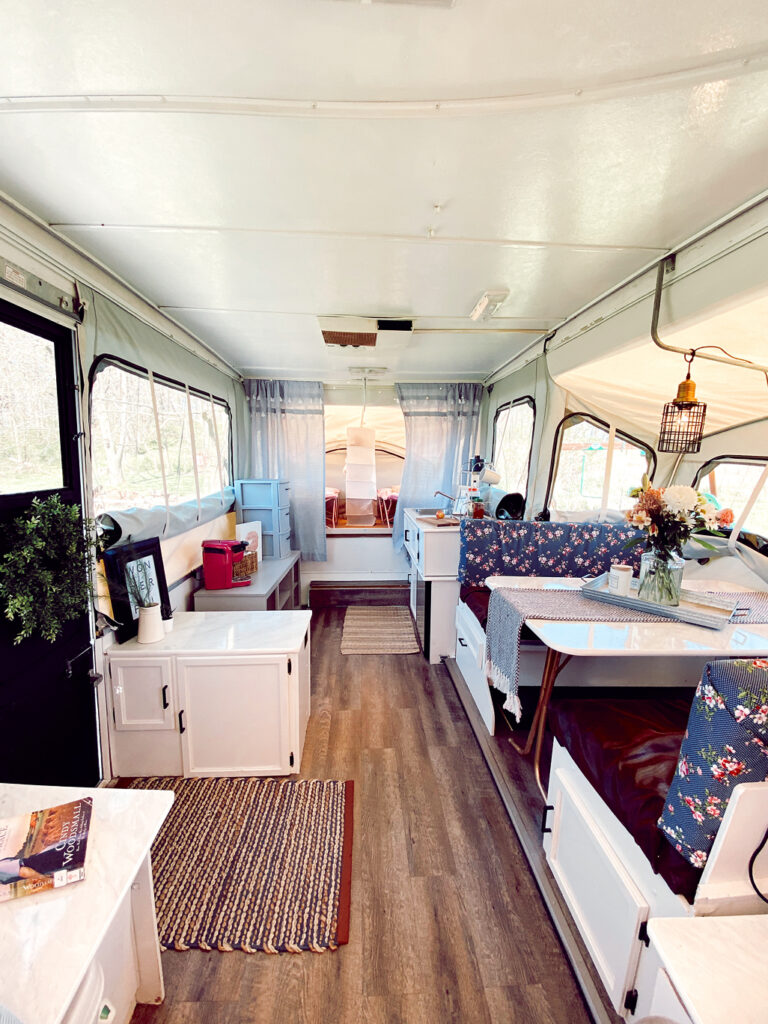
And HERE is the inside!! This spring we are planning on finishing the flooring (on the step), and also building in a storage/bench seat where the current bookshelf is. I might even build a seat OVER the bookshelf and keep the shelf for storage, because I love how handy it is in there so much!
Pop Up Camper Remodel – Glamper

Pop-Up Camper Slide Out Kitchen Remodel
The dining area turned out SO CUTE, and I just adore this awesome plug-in industrial pendant light!

The kitchen is one of my favorite areas of the camper! I love how the countertop, and the faucet, and the fridge turned out! Also, I found this super cute little rack, and it’s the PERFECT size for some cute kitchen storage in your camper!

Pop-Up Camer Remodel White Cabinets 
Popup Camper Kitchen Remodel 
Pop-up Camper Modern Renovation
I also love how the fridge turned out! I used stainless steel contact paper on the front, and painted the surround black!

Camper Fridge Re-model 
Camper Marble Countertop Redo

Pop Up Camper Curtains
The little tassel curtains are one of my favorite touches, and I use these velcro top, hanging organizers in the opposite bunk end! We took out the old stained mattress on the full size bunk end, and put the girl’s two cots on each side of the organizers, so they both had a storage shelf near their bed! It worked out so well!

Here’s a quick look at the opposite side, with the bookcase storage, and the 3 drawer bin. Both of these elements provided SO MUCH storage for the pop-up. I know that ample storage for these campers is hard to come-by, and this made it all so easy!

Pop Up Camper Remodel 
Pop Up Camper Storage
Also, I decided to paint the inside of the door with black chalk paint, and I LOVE how that turned out! I used a command strip hook to hang the wreath!

Pop Up Camer Remodel 
Pop Up Camper Door Ideas
Looking down the other side towards the king bed area. We left the mattress on this side, and added a VERY thick memory foam. It actually makes sleeping in here SO comfy, and I love how much space there is!

Pop Up Camper Remodel Ideas 
Pop Up Camper Bunk End
A few more close-up details, including the flooring. This flooring turned out SO well, and has held up very well, even after the winter!


So there she is!! It was such an awesome experience, and I’m planning on doing updated, more professional photos this spring, when we finish the inside completely!
To recap, here are a few Pin-able side by sides of where she was, to where she is now!

Popup Camper Remodel Viking Pop Up Camper Camper renovation Ideas Glamper Pure Blonde Blog 
Popup Camper Remodel Viking Pop Up Camper Camper renovation Ideas Glamper Pure Blonde Blog 
Popup Camper Remodel Viking Pop Up Camper Camper renovation Ideas Glamper Pure Blonde Blog 
Popup Camper Remodel Viking Pop Up Camper Camper renovation Ideas Glamper Pure Blonde Blog

I’m just in love with her, and I can’t wait for this year’s camping season! Comment with your questions, and let me know what you think!! You can also shop the various material and items that I sourced for this camper below! (These are affiliate links, and if you use them to purchase anything for your renovation, it doesn’t cost you any more, but I’ll receive a small commission for my family, so that I can spend time creating more posts like this for you!).
[shop_the_post_widget id=”344″]
Thanks very interesting blog!
Greate pieces. Keep writing such kind of information on your blog.
Im really impressed by your blog.
Hey there, You’ve done a fantastic job. I will certainly digg it and personally suggest
to my friends. I’m sure they will be benefited from this site.
Awesome post.
I LOVE everything you’ve done! Can you tell me how you hung the new curtains? Is it a tension rod? We are currently remodeling ours and how to rehang curtains without those little snap on hooks is stumping me.
Thank you!
Hi Becky! Thank you so much! It is a tension rod! It works great, and I just take them down before folding up. I have the one I used linked below the post. It was cheap, and it works great!!
Did you have a link to where you bought the counter top marble paper?
Hi Alex! Yes! It’s linked under the post, or you can go here: https://bit.ly/2FcCRZp I love how thick this one is, and that it’s more shiny, so that it looks more like real marble. Most of the people that go into the camper are amazed that I put marble in my camper, and I have to tell them it’s paper! 🙂
OH! MY! GOSH! I absolutely LOVE everything you did with your camper! Very beautiful and inspiring…thank you for the motivation to make some changes. We literally just bought a camper this morning and I can’t wait to get it ready for next Spring/Summer!!
Hi Natalie! Thank you so much! I’m glad you like it. Let me know how yours goes! It’s so worth it!
The pop up turned out great. I’m also updating mine. The red rug inside the door is perfect. May I ask where you bought it?
Thank you so much! It’s actually more of a reddish/brown and navy rug, but I got it from Target!
https://bit.ly/2IKxlPP Here’s the link to it!
Great, thanks!
Hi! We’re seriously considering getting a popup camper and I think your blog post just convinced us! Would you mind sharing approximately how much the new canvas cost? It really does make quite a difference! Thanks!
Hi Mia! I think ours ended up being around $1,100? It was more expensive because of the size.. I think people that have Jayco pop-ups or even newer ones can order them from the manufacturer and get them for much less. Ours was so old, we had to have a second hand party make it. BUT they do have a lifetime warranty, which is awesome, even if you decide to re-sell it at some point. If I were going to do it again, I would go with one that didn’t need a new canvas, unless I could get the body for a REALLY great deal. I hope that helps, and thank you so much for checking out my renovation! 🙂