Wood Burner / Fireplace Makeover
Ahhh.. This area of our home has seen MANY changes through the years, from the original days of an old, inefficient wood stove on the bare concrete floor, to finally getting flooring and a tiled surround, to a better wood stove, and a paint refresh of the tile, to now, the complete overhaul.. It’s been one of the most frequently changed areas in our home, and I’m just so thrilled with where we’ve finally ended up.
Before getting to the current state of affairs, let’s do a little throw-back to where this space started.

It was kind of hideous if I’m being honest, and that pipe was always like the leaning tower of Pisa, but it was our only option when we first installed this burner, because well, the inside thin wall pipe was much cheaper than the outside-double walled pipe, and we simply couldn’t afford to go outside with how much pipe we needed, and we had to go inside. It was kind of an eye sore, but it helped to keep our house warm, and that was what we needed.
Fast forward YEARS later, about 8 to be exact, and we found a great deal on a Hearthstone Soapstone stove. We had pretty much stopped using the old one completely, because of how inefficient the stove was. We couldn’t keep enough wood cut to keep it running all winter, and the heat was horrible. It would burn so hot that you couldn’t stand to be in the living room, and then it would be out, and it would be freezing again… It definitely had zero regulation, or ability to produce a consistent heat.
So along with the new stove, we re-did all of the piping as well, and finally had the funds to go outside with the pipe and get that long, leaning eye-sore out of the living room.

The new wood burner is also much more energy efficient (the soapstone stoves are just so nice), and we loved that it had a glass front so we could see the fire. It made it feel like a real fireplace, and was a much prettier focal point for the room.
Later on, we also ended up painting the surrounding tile with chalk paint, and a stenciled the back. It really updated the ugly brown tile and made such a cute focal wall!
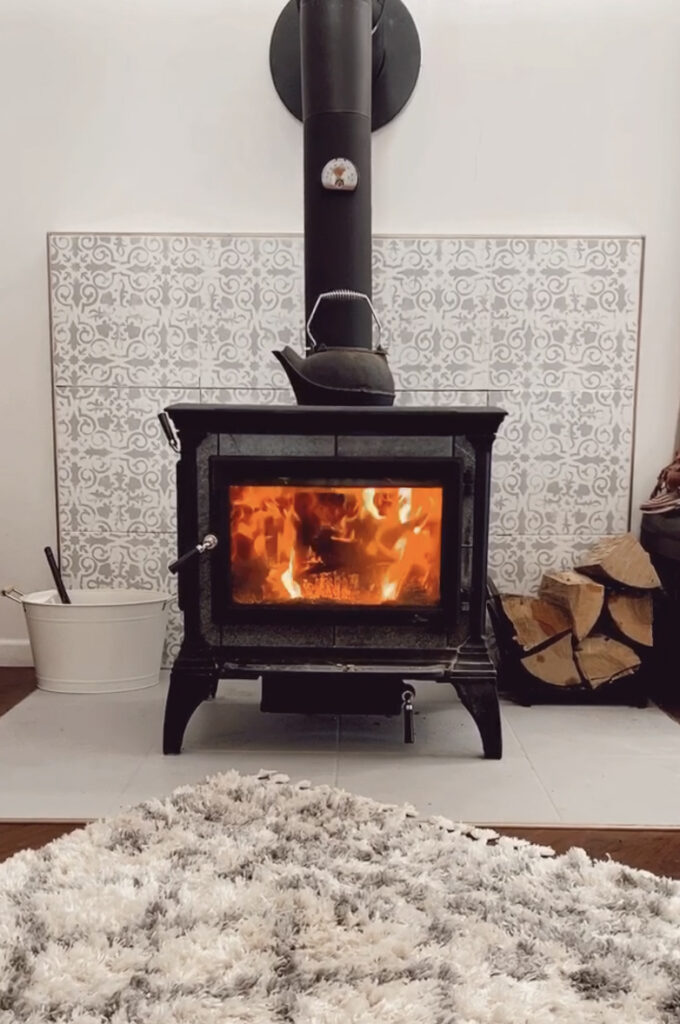
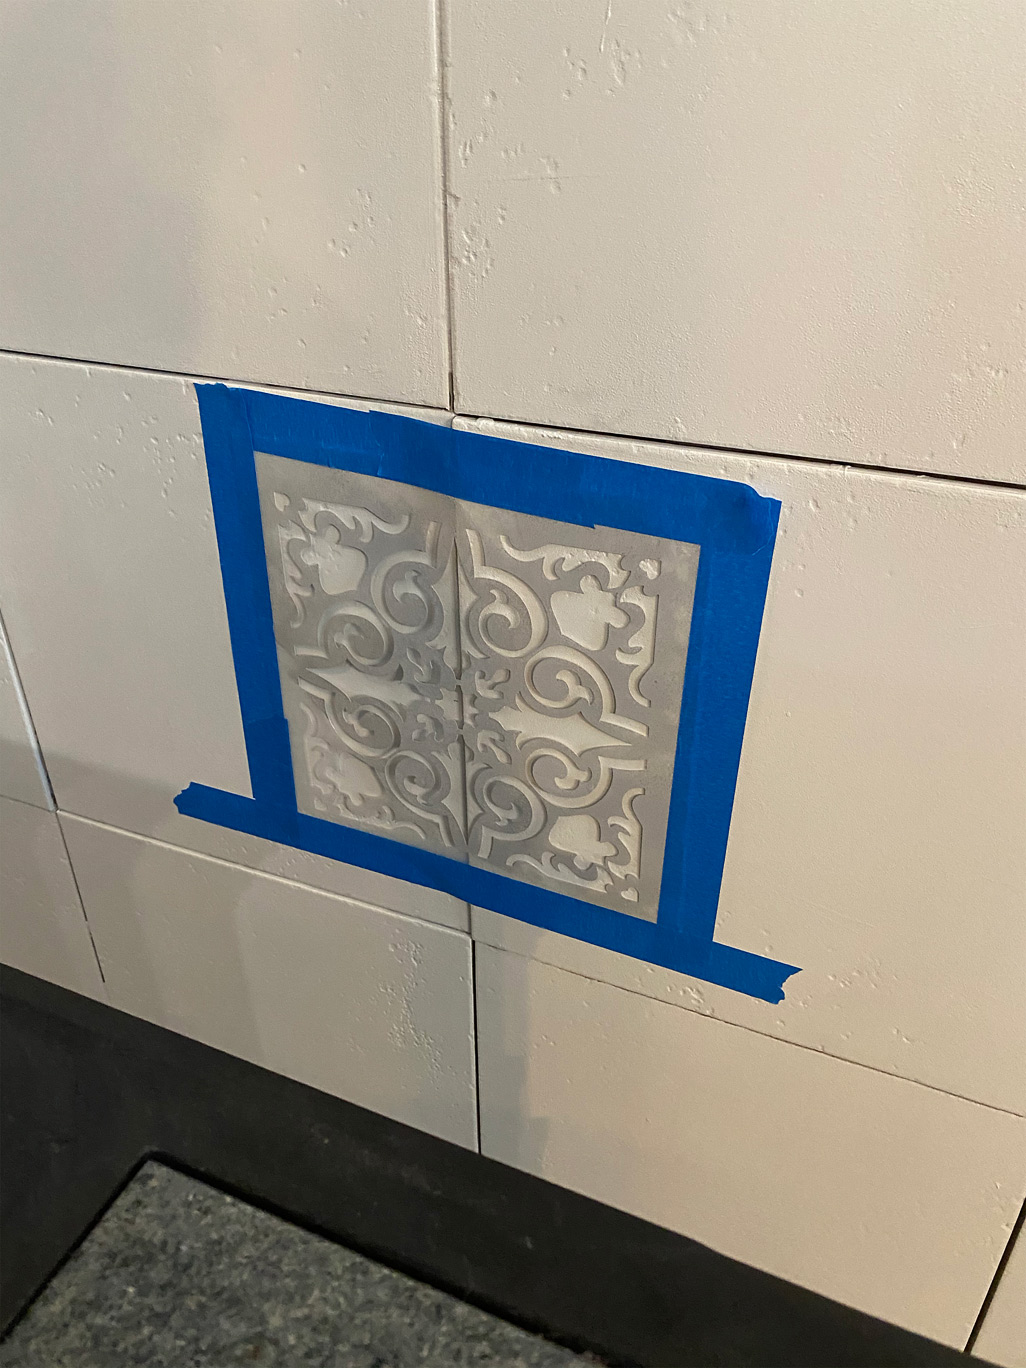
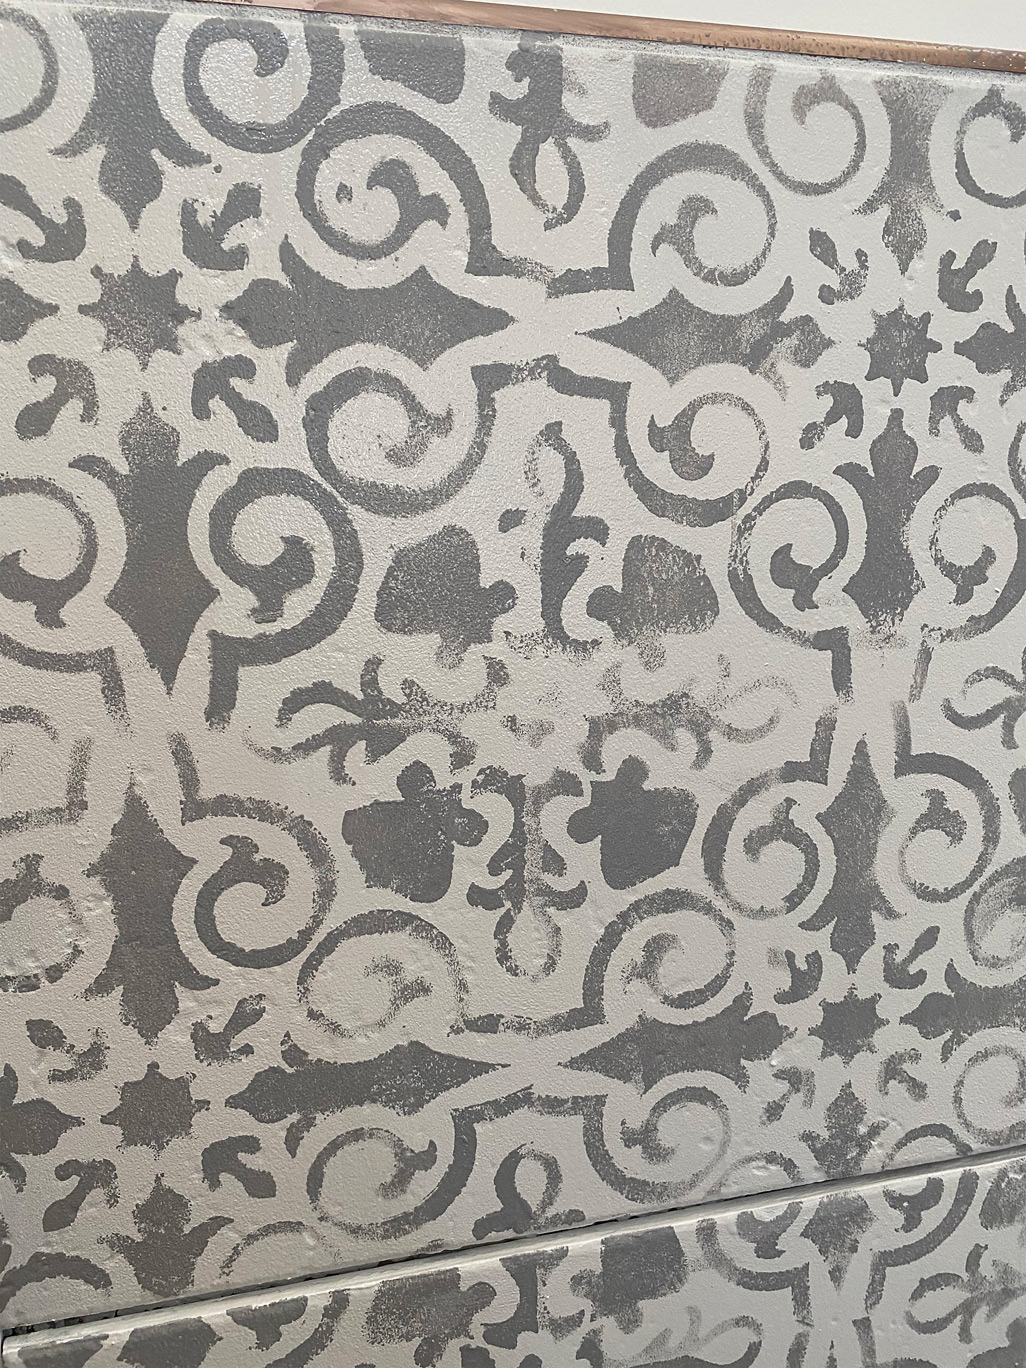
I thoroughly cleaned the tile with TSP, and painted it with chalk paint and a sponge roller. I used a light gray, and white. The bottom was painted solid with the light gray, and then I went over the back with the white. After it dried, we used the gray and the stencil to paint the back tile.


The stencil pattern we tried to make it more “distressed” because I wanted more of a vintage look, which made it easier to not worry about everything matching up perfectly.
To seal everything, I used polycrylic and rolled it on the back and the floor. I only did one coat, and in retro-spect, I would have used actual polyurethane and done at least two coats on the floor so that it would have held up better.


I was on a time crunch because I wanted to get the wood burner going again, and also the hubby was on a work trip, and was returning the next day, and we wanted the makeover to be a surprise! So it was a hurried job, and I wish that I had taken more time, because the floor paint especially didn’t really hold up as well as I had hoped, but the stencil and the overall look was so beautiful! What an update to ugly old 10 year old brown tile! Here’s a little side-by-side before and after!
A year later, some of the paint had scratched up on the floor, and I wish I had spent more time prepping and cleaning the surface BEFORE painting, as well as doing more than one coat, and using a tougher sealer.
I’ve linked in the affiliate links below the colors and stencil that we used to paint the tile.
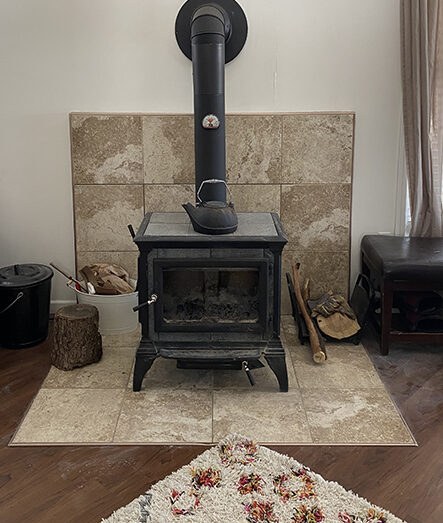
All, in all, though we could have just left it like this and been happy, but after having this stove, we started researching the other types of stoves that Hearthstone had available and found another one that we fell in love with! We also ended up ripping out all of the tile, and re-doing the foundation so that it was more secure, and went with a natural stone, and we even built a beautiful wood mantle. I’ll continue that in another post, since this one is already so long so tap below for part two of the fireplace renovation!
Until next time!!